Foram encontradas 540 questões.
Analise os seguintes itens com relação aos servidores da Administração Pública:
I. É vedado ao servidor público civil o direito à livre associação sindical.
II. Os vencimentos dos cargos do Poder Legislativo e do Poder Judiciário não poderão ser superiores aos pagos pelo Poder Executivo.
III. O prazo de validade do concurso público será de até dois anos, prorrogável uma vez, por igual período.
Assinale a opção correta.
Provas

Analise os itens abaixo quanto aos princípios e normas constitucionais aos quais deve a Administração Pública direta e indireta de qualquer dos Poderes de todos os entes integrantes da Federação obedecer.
I. A publicidade dos atos, programas, obras, serviços e campanhas dos órgãos públicos deverá ter caráter educativo, informativo ou de orientação social, dela não podendo constar nomes, símbolos ou imagens que caracterizem promoção pessoal de autoridades ou servidores públicos.
II. A proibição de acumulação remunerada de cargos, empregos e funções públicos não abrange as sociedades de economia mista e as empresas públicas, sendo necessário, porém comprovar a compatibilidade de horários.
III. Os atos de improbidade administrativa importarão a suspensão dos direitos políticos, a perda da função pública, a indisponibilidade dos bens e o ressarcimento ao erário, na forma e gradação previstas em lei, sem prejuízo da ação penal cabível.
IV. Os cargos em comissão, preenchidos exclusivamente por servidores ocupantes de cargo efetivo, destinam-se às atribuições de direção, chefia e assessoramento.
Assinale a opção correta.
Provas
How To Assemble A Desktop PC/Assembly
From Wikibooks, the open-content textbooks collection
Now that you have selected your parts, you get to what is arguably the most fun part of the process: putting the parts together.
Tools and equipment
You won't need many tools to assemble your computer, in fact the only one you must have is the screwdriver and an anti-static wristband (very useful), but if you can get most of the following togcther, you'II find things a little e easier.
Basic tools
Before you begin buílding or refitting a computer, you will need some basic tools:
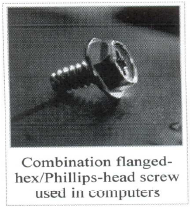
1. #2 Phillips-head (cross-shaped) screwdriver
2. Needlenose pliers
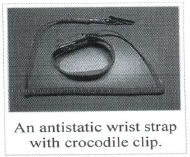
3. Anti-static Wrist Strap
4. A large level working space
Optional, but useful tools
Some other tools and equipment can.come in handy as well, such as:
1. Spring action parts grabber.
2. Electrical tape
3. Wire or nylon ties
4. Flashlight, preferably hands-free
5. A second, working computer to swap parts, look for tips, ask for help online, download drivers and patches, etc. - very useful
6. A can of compressed air - useful when working with older parts that have collected dust. A better alternative but also more costly, is a vacuum cleaner designed for cleaning electronics.
Preparation
Proper preparation is the key to a successful build. Before you begin, make sure you have all the tools you will need, secure a clear, well-lit workspace. Gather all the components you'II be using and unpack them one at a time. verifying that everything that is supposed to be there is actually present. At this point you should leave the parts themselves in their protective anti-static bags, and assemble all the accompanying manuals. Now I know you want to get started, but trust me, read the manuals, check the diagrams, make sure you understand where each part goes and how it attaches. if there is anything you don't understand, now is the time to do a little extra internet research or call the manufacturer with your questions.
Find a dry, well-ventilated place to do your work. You should have plenty of light and if possible, you should choose an area without carpet on the floor, as carpet tends to generate a lot of static. An unfurnished basement ia a good work lacation.
 Safety precautions are important for your own security. Please read the safety precautions thoroughly.
Safety precautions
http://en.wikibooks.org/wiki/How_To_Assemble_A_Desktop_PC/Assembly 18/6/2010
The title and the subtitle of the graph announce the following:
Provas
How To Assemble A Desktop PC/Assembly
From Wikibooks, the open-content textbooks collection
Now that you have selected your parts, you get to what is arguably the most fun part of the process: putting the parts together.
Tools and equipment
You won't need many tools to assemble your computer, in fact the only one you must have is the screwdriver and an anti-static wristband (very useful), but if you can get most of the following togcther, you'II find things a little e easier.
Basic tools
Before you begin buílding or refitting a computer, you will need some basic tools:
1. #2 Phillips-head (cross-shaped) screwdriver
2. Needlenose pliers
3. Anti-static Wrist Strap
4. A large level working space
Optional, but useful tools
Some other tools and equipment can.come in handy as well, such as:
1. Spring action parts grabber.
2. Electrical tape
3. Wire or nylon ties
4. Flashlight, preferably hands-free
5. A second, working computer to swap parts, look for tips, ask for help online, download drivers and patches, etc. - very useful
6. A can of compressed air - useful when working with older parts that have collected dust. A better alternative but also more costly, is a vacuum cleaner designed for cleaning electronics.
Preparation
Proper preparation is the key to a successful build. Before you begin, make sure you have all the tools you will need, secure a clear, well-lit workspace. Gather all the components you'II be using and unpack them one at a time. verifying that everything that is supposed to be there is actually present. At this point you should leave the parts themselves in their protective anti-static bags, and assemble all the accompanying manuals. Now I know you want to get started, but trust me, read the manuals, check the diagrams, make sure you understand where each part goes and how it attaches. if there is anything you don't understand, now is the time to do a little extra internet research or call the manufacturer with your questions.
Find a dry, well-ventilated place to do your work. You should have plenty of light and if possible, you should choose an area without carpet on the floor, as carpet tends to generate a lot of static. An unfurnished basement ia a good work lacation.
Safety precautions are important for your own security. Please read the safety precautions thoroughly.
Safety precautions
http://en.wikibooks.org/wiki/How_To_Assemble_A_Desktop_PC/Assembly 18/6/2010
Consider the statements about the adoption curve presented in the graph and choose the correct alternative.
I. Adoption rates decline between 2000 and 2001.
II. Adoption rates reach the highest peak around 2003
III. Adoption rates stabilize between 2003 and 2007
IV. Adoption in 2003 added to more than 4,000
Provas
How To Assemble A Desktop PC/Assembly
From Wikibooks, the open-content textbooks collection
Now that you have selected your parts, you get to what is arguably the most fun part of the process: putting the parts together.
Tools and equipment
You won't need many tools to assemble your computer, in fact the only one you must have is the screwdriver and an anti-static wristband (very useful), but if you can get most of the following togcther, you'II find things a little e easier.
Basic tools
Before you begin buílding or refitting a computer, you will need some basic tools:
1. #2 Phillips-head (cross-shaped) screwdriver
2. Needlenose pliers
3. Anti-static Wrist Strap
4. A large level working space
Optional, but useful tools
Some other tools and equipment can.come in handy as well, such as:
1. Spring action parts grabber.
2. Electrical tape
3. Wire or nylon ties
4. Flashlight, preferably hands-free
5. A second, working computer to swap parts, look for tips, ask for help online, download drivers and patches, etc. - very useful
6. A can of compressed air - useful when working with older parts that have collected dust. A better alternative but also more costly, is a vacuum cleaner designed for cleaning electronics.
Preparation
Proper preparation is the key to a successful build. Before you begin, make sure you have all the tools you will need, secure a clear, well-lit workspace. Gather all the components you'II be using and unpack them one at a time. verifying that everything that is supposed to be there is actually present. At this point you should leave the parts themselves in their protective anti-static bags, and assemble all the accompanying manuals. Now I know you want to get started, but trust me, read the manuals, check the diagrams, make sure you understand where each part goes and how it attaches. if there is anything you don't understand, now is the time to do a little extra internet research or call the manufacturer with your questions.
Find a dry, well-ventilated place to do your work. You should have plenty of light and if possible, you should choose an area without carpet on the floor, as carpet tends to generate a lot of static. An unfurnished basement ia a good work lacation.
Safety precautions are important for your own security. Please read the safety precautions thoroughly.
Safety precautions
http://en.wikibooks.org/wiki/How_To_Assemble_A_Desktop_PC/Assembly 18/6/2010
The figures in the column give data on:
Provas
How To Assemble A Desktop PC/Assembly
From Wikibooks, the open-content textbooks collection
Now that you have selected your parts, you get to what is arguably the most fun part of the process: putting the parts together.
Tools and equipment
You won't need many tools to assemble your computer, in fact the only one you must have is the screwdriver and an anti-static wristband (very useful), but if you can get most of the following togcther, you'II find things a little e easier.
Basic tools
Before you begin buílding or refitting a computer, you will need some basic tools:
1. #2 Phillips-head (cross-shaped) screwdriver
2. Needlenose pliers
3. Anti-static Wrist Strap
4. A large level working space
Optional, but useful tools
Some other tools and equipment can.come in handy as well, such as:
1. Spring action parts grabber.
2. Electrical tape
3. Wire or nylon ties
4. Flashlight, preferably hands-free
5. A second, working computer to swap parts, look for tips, ask for help online, download drivers and patches, etc. - very useful
6. A can of compressed air - useful when working with older parts that have collected dust. A better alternative but also more costly, is a vacuum cleaner designed for cleaning electronics.
Preparation
Proper preparation is the key to a successful build. Before you begin, make sure you have all the tools you will need, secure a clear, well-lit workspace. Gather all the components you'II be using and unpack them one at a time. verifying that everything that is supposed to be there is actually present. At this point you should leave the parts themselves in their protective anti-static bags, and assemble all the accompanying manuals. Now I know you want to get started, but trust me, read the manuals, check the diagrams, make sure you understand where each part goes and how it attaches. if there is anything you don't understand, now is the time to do a little extra internet research or call the manufacturer with your questions.
Find a dry, well-ventilated place to do your work. You should have plenty of light and if possible, you should choose an area without carpet on the floor, as carpet tends to generate a lot of static. An unfurnished basement ia a good work lacation.
Safety precautions are important for your own security. Please read the safety precautions thoroughly.
Safety precautions
http://en.wikibooks.org/wiki/How_To_Assemble_A_Desktop_PC/Assembly 18/6/2010
Analyze the following graph and answer the questions accordingly.

According to the graph, adoption of children by U. S. parents from 2004 to 2009:
Provas
How To Assemble A Desktop PC/Assembly
From Wikibooks, the open-content textbooks collection
Now that you have selected your parts, you get to what is arguably the most fun part of the process: putting the parts together.
Tools and equipment
You won't need many tools to assemble your computer, in fact the only one you must have is the screwdriver and an anti-static wristband (very useful), but if you can get most of the following togcther, you'II find things a little e easier.
Basic tools
Before you begin buílding or refitting a computer, you will need some basic tools:
1. #2 Phillips-head (cross-shaped) screwdriver
2. Needlenose pliers
3. Anti-static Wrist Strap
4. A large level working space
Optional, but useful tools
Some other tools and equipment can.come in handy as well, such as:
1. Spring action parts grabber.
2. Electrical tape
3. Wire or nylon ties
4. Flashlight, preferably hands-free
5. A second, working computer to swap parts, look for tips, ask for help online, download drivers and patches, etc. - very useful
6. A can of compressed air - useful when working with older parts that have collected dust. A better alternative but also more costly, is a vacuum cleaner designed for cleaning electronics.
Preparation
Proper preparation is the key to a successful build. Before you begin, make sure you have all the tools you will need, secure a clear, well-lit workspace. Gather all the components you'II be using and unpack them one at a time. verifying that everything that is supposed to be there is actually present. At this point you should leave the parts themselves in their protective anti-static bags, and assemble all the accompanying manuals. Now I know you want to get started, but trust me, read the manuals, check the diagrams, make sure you understand where each part goes and how it attaches. if there is anything you don't understand, now is the time to do a little extra internet research or call the manufacturer with your questions.
Find a dry, well-ventilated place to do your work. You should have plenty of light and if possible, you should choose an area without carpet on the floor, as carpet tends to generate a lot of static. An unfurnished basement ia a good work lacation.
Safety precautions are important for your own security. Please read the safety precautions thoroughly.
Safety precautions
http://en.wikibooks.org/wiki/How_To_Assemble_A_Desktop_PC/Assembly 18/6/2010
The most fun part in assembling a computer is to:
Provas
How To Assemble A Desktop PC/Assembly
From Wikibooks, the open-content textbooks collection
Now that you have selected your parts, you get to what is arguably the most fun part of the process: putting the parts together.
Tools and equipment
You won't need many tools to assemble your computer, in fact the only one you must have is the screwdriver and an anti-static wristband (very useful), but if you can get most of the following togcther, you'II find things a little e easier.
Basic tools
Before you begin buílding or refitting a computer, you will need some basic tools:
1. #2 Phillips-head (cross-shaped) screwdriver
2. Needlenose pliers
3. Anti-static Wrist Strap
4. A large level working space
Optional, but useful tools
Some other tools and equipment can.come in handy as well, such as:
1. Spring action parts grabber.
2. Electrical tape
3. Wire or nylon ties
4. Flashlight, preferably hands-free
5. A second, working computer to swap parts, look for tips, ask for help online, download drivers and patches, etc. - very useful
6. A can of compressed air - useful when working with older parts that have collected dust. A better alternative but also more costly, is a vacuum cleaner designed for cleaning electronics.
Preparation
Proper preparation is the key to a successful build. Before you begin, make sure you have all the tools you will need, secure a clear, well-lit workspace. Gather all the components you'II be using and unpack them one at a time. verifying that everything that is supposed to be there is actually present. At this point you should leave the parts themselves in their protective anti-static bags, and assemble all the accompanying manuals. Now I know you want to get started, but trust me, read the manuals, check the diagrams, make sure you understand where each part goes and how it attaches. if there is anything you don't understand, now is the time to do a little extra internet research or call the manufacturer with your questions.
Find a dry, well-ventilated place to do your work. You should have plenty of light and if possible, you should choose an area without carpet on the floor, as carpet tends to generate a lot of static. An unfurnished basement ia a good work lacation.
Safety precautions are important for your own security. Please read the safety precautions thoroughly.
Safety precautions
http://en.wikibooks.org/wiki/How_To_Assemble_A_Desktop_PC/Assembly 18/6/2010
A good place to assemble the computer should be:
Provas
How To Assemble A Desktop PC/Assembly
From Wikibooks, the open-content textbooks collection
Now that you have selected your parts, you get to what is arguably the most fun part of the process: putting the parts together.
Tools and equipment
You won't need many tools to assemble your computer, in fact the only one you must have is the screwdriver and an anti-static wristband (very useful), but if you can get most of the following togcther, you'II find things a little e easier.
Basic tools
Before you begin buílding or refitting a computer, you will need some basic tools:
1. #2 Phillips-head (cross-shaped) screwdriver
2. Needlenose pliers
3. Anti-static Wrist Strap
4. A large level working space
Optional, but useful tools
Some other tools and equipment can.come in handy as well, such as:
1. Spring action parts grabber.
2. Electrical tape
3. Wire or nylon ties
4. Flashlight, preferably hands-free
5. A second, working computer to swap parts, look for tips, ask for help online, download drivers and patches, etc. - very useful
6. A can of compressed air - useful when working with older parts that have collected dust. A better alternative but also more costly, is a vacuum cleaner designed for cleaning electronics.
Preparation
Proper preparation is the key to a successful build. Before you begin, make sure you have all the tools you will need, secure a clear, well-lit workspace. Gather all the components you'II be using and unpack them one at a time. verifying that everything that is supposed to be there is actually present. At this point you should leave the parts themselves in their protective anti-static bags, and assemble all the accompanying manuals. Now I know you want to get started, but trust me, read the manuals, check the diagrams, make sure you understand where each part goes and how it attaches. if there is anything you don't understand, now is the time to do a little extra internet research or call the manufacturer with your questions.
Find a dry, well-ventilated place to do your work. You should have plenty of light and if possible, you should choose an area without carpet on the floor, as carpet tends to generate a lot of static. An unfurnished basement ia a good work lacation.
Safety precautions are important for your own security. Please read the safety precautions thoroughly.
Safety precautions
http://en.wikibooks.org/wiki/How_To_Assemble_A_Desktop_PC/Assembly 18/6/2010
One procedure recommended when you meet something you do not understand is to:
Provas
How To Assemble A Desktop PC/Assembly
From Wikibooks, the open-content textbooks collection
Now that you have selected your parts, you get to what is arguably the most fun part of the process: putting the parts together.
Tools and equipment
You won't need many tools to assemble your computer, in fact the only one you must have is the screwdriver and an anti-static wristband (very useful), but if you can get most of the following togcther, you'II find things a little e easier.
Basic tools
Before you begin buílding or refitting a computer, you will need some basic tools:
1. #2 Phillips-head (cross-shaped) screwdriver
2. Needlenose pliers
3. Anti-static Wrist Strap
4. A large level working space
Optional, but useful tools
Some other tools and equipment can.come in handy as well, such as:
1. Spring action parts grabber.
2. Electrical tape
3. Wire or nylon ties
4. Flashlight, preferably hands-free
5. A second, working computer to swap parts, look for tips, ask for help online, download drivers and patches, etc. - very useful
6. A can of compressed air - useful when working with older parts that have collected dust. A better alternative but also more costly, is a vacuum cleaner designed for cleaning electronics.
Preparation
Proper preparation is the key to a successful build. Before you begin, make sure you have all the tools you will need, secure a clear, well-lit workspace. Gather all the components you'II be using and unpack them one at a time. verifying that everything that is supposed to be there is actually present. At this point you should leave the parts themselves in their protective anti-static bags, and assemble all the accompanying manuals. Now I know you want to get started, but trust me, read the manuals, check the diagrams, make sure you understand where each part goes and how it attaches. if there is anything you don't understand, now is the time to do a little extra internet research or call the manufacturer with your questions.
Find a dry, well-ventilated place to do your work. You should have plenty of light and if possible, you should choose an area without carpet on the floor, as carpet tends to generate a lot of static. An unfurnished basement ia a good work lacation.
Safety precautions are important for your own security. Please read the safety precautions thoroughly.
Safety precautions
http://en.wikibooks.org/wiki/How_To_Assemble_A_Desktop_PC/Assembly 18/6/2010
About the preparation step it is said that.
I- The successful build depends on a key.
II- You must have all the tools you will need.
III- The components should be unpacked in pairs.
Provas
Caderno Container